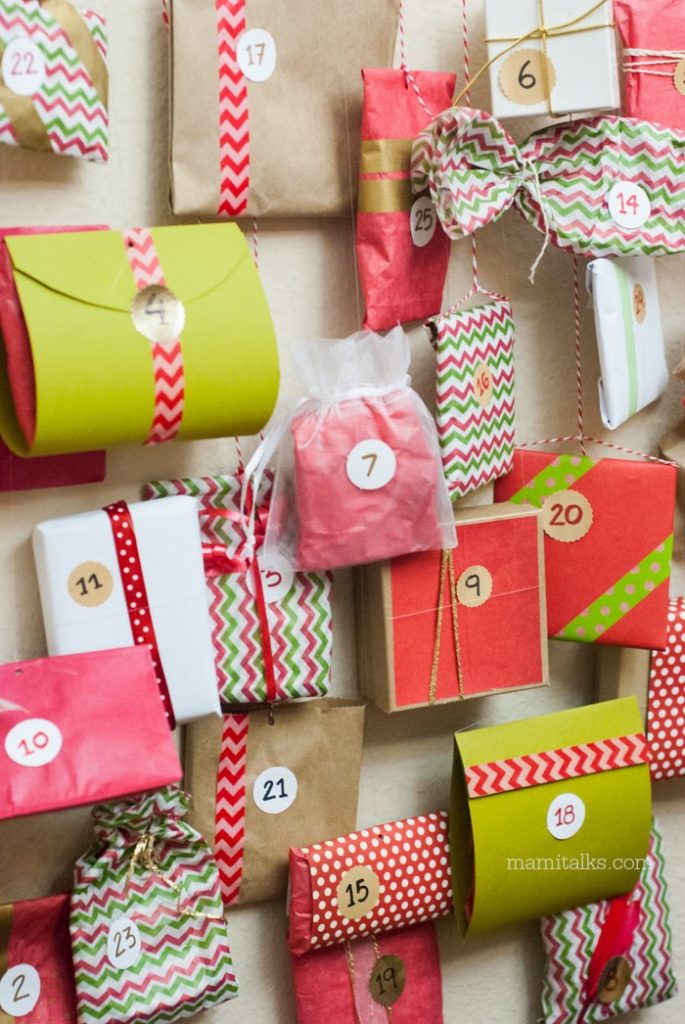
This is our advent calendar. We are all in love with it! For different reasons but we all love it. I actually wasn’t planning on making an advent calendar at all, not even buying one. Sometimes we get the ones they sell at Trader Joe’s with chocolates but I don’t like that its pure chocolate that the kids are eager to eat after dinner every day.
Anyways, about a week ago my friend Karina who has an online handmade scrapbooking store (Mi Tiendita Scrap) posted the advent calendar DIY instructions she made and I just fell in love with it. I asked her what had she put on each gift and then I fell more in love it and decided to make one for Adrian and Maya.
The complete calendar is a Lego set, it is divided in 25 bags with the corresponding copy of each instruction in each bag, they actually don’t know what the final Lego set will be until the end!
It was the weekend of Thanksgiving so we had to act fast. I showed Derek and he loved the idea as well so we started. It takes some work so if you want to do this, here is what I did:
YOU WILL NEED:
- 1, 2 or 3 Lego sets (depending on the number of kids!)
- Snack size ziplock bags
- All kinds of small boxes and gift wrap or cute tissue paper
- Ribbon
- Washi tape
- Circle stickers
- Markers
- A real branch stick
- Spray paint or craft paint to paint the branch
- Bakers Twine
- Fishing line
- Hole Puncher
HOW TO MAKE THE CALENDAR
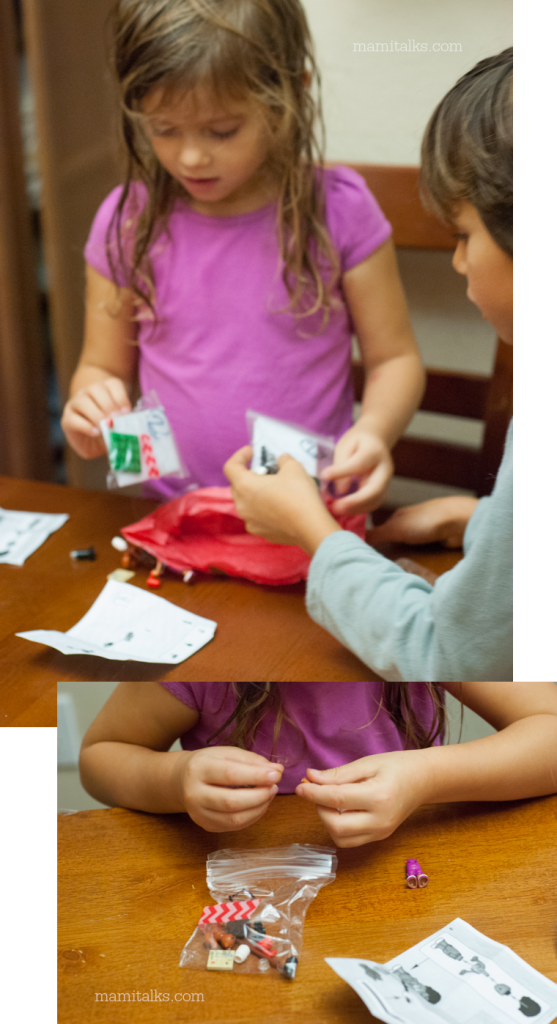
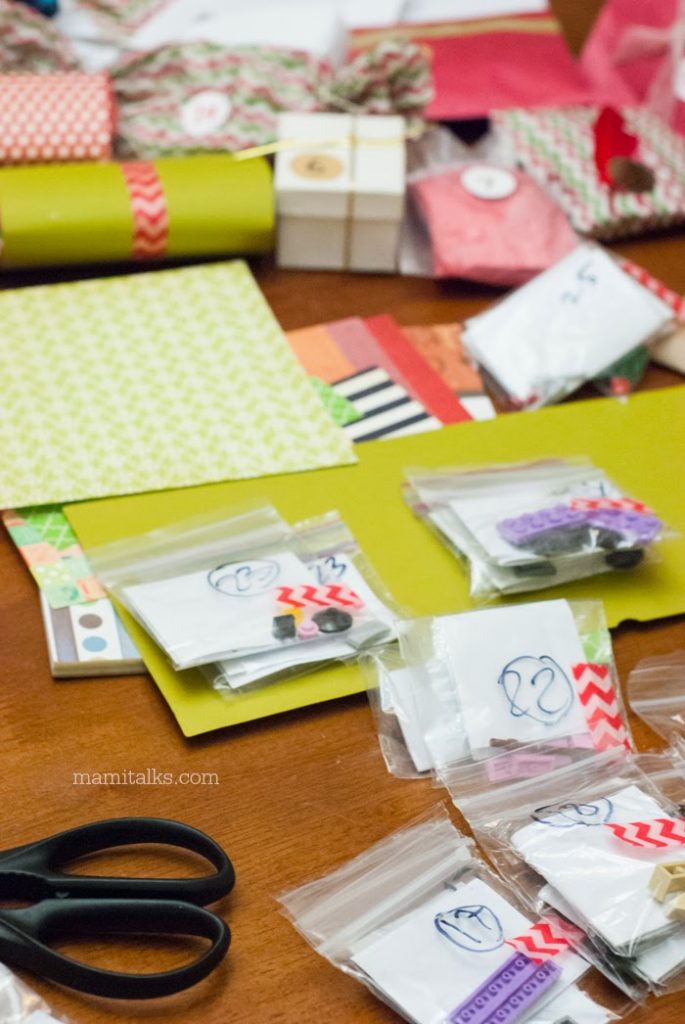
- Separate de legos from each set in 25 steps, you can use the ziplock bags cut in 2 or 3, tape the sides and you can create up to 3 bags from one. Make sure to write the number of step on the bag and you can write it also in the instruction booklet.
- Make copies of the instruction booklet and cut the pages corresponding to each of the 25 steps you separated and include them inside each bag.
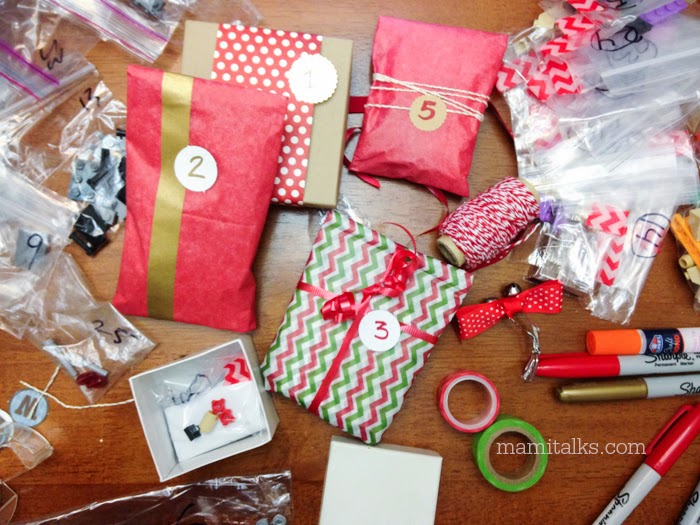
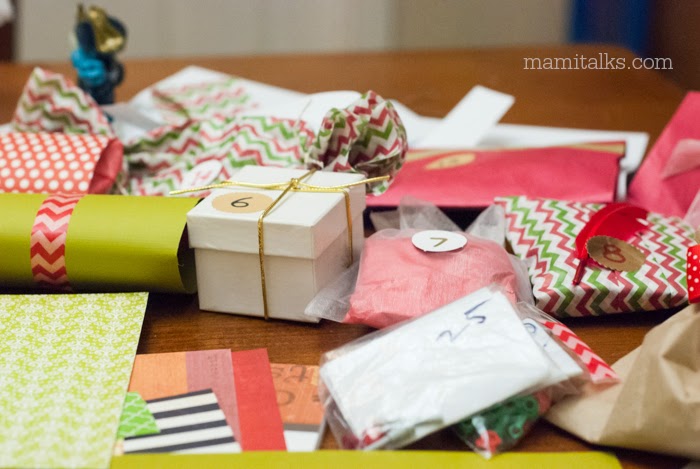
- Once you have the 25 baggies you are ready to wrap! I wrapped both baggies in one gift, I differentiate them by adding a piece of tape on Maya’s bag only. Try to stick to one color palette. I only bought Christmas tissue paper and complemented it with scraps I had at home, little bits of paper and little boxes I keep from gifts I’ve gotten before, so you don’t have to spend much in wrapping, I even used wine paper bags! I just cut them little.
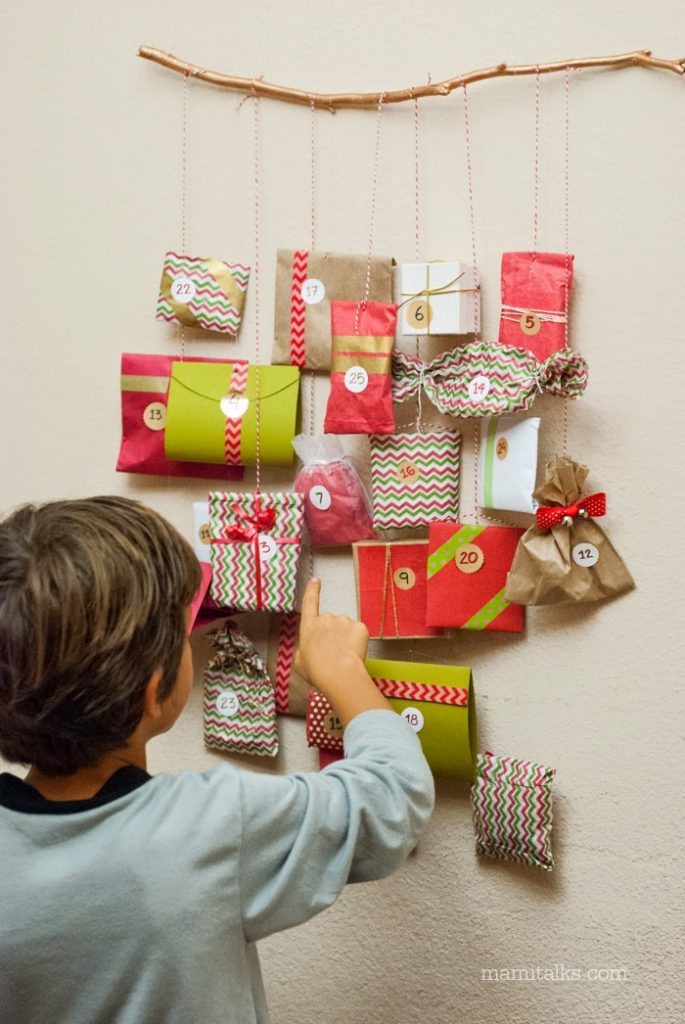
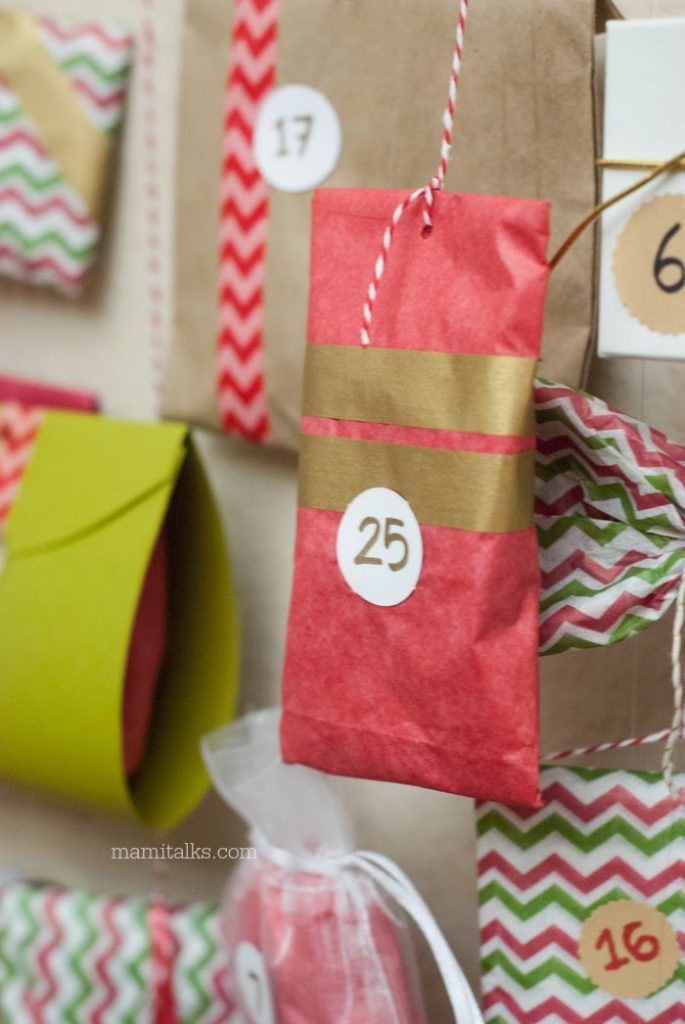
- Prepare the stick, spray paint it or just paint it with a brush and let it dry. Attach a fishing line to both ends (I made knots) so you can hang it on the middle to a hook on the wall.
- Time to hang the gifts. Open a hole on each gift whenever possible and use the fishing line or the baker’s twine to hang it. Do it one by one looking at the overall calendar so that the end looks balanced in shapes and colors. When you can’t open a hole you can kind of wrap the fishing line to the box so it grabs the whole box and it won’t show because it’s so thin.
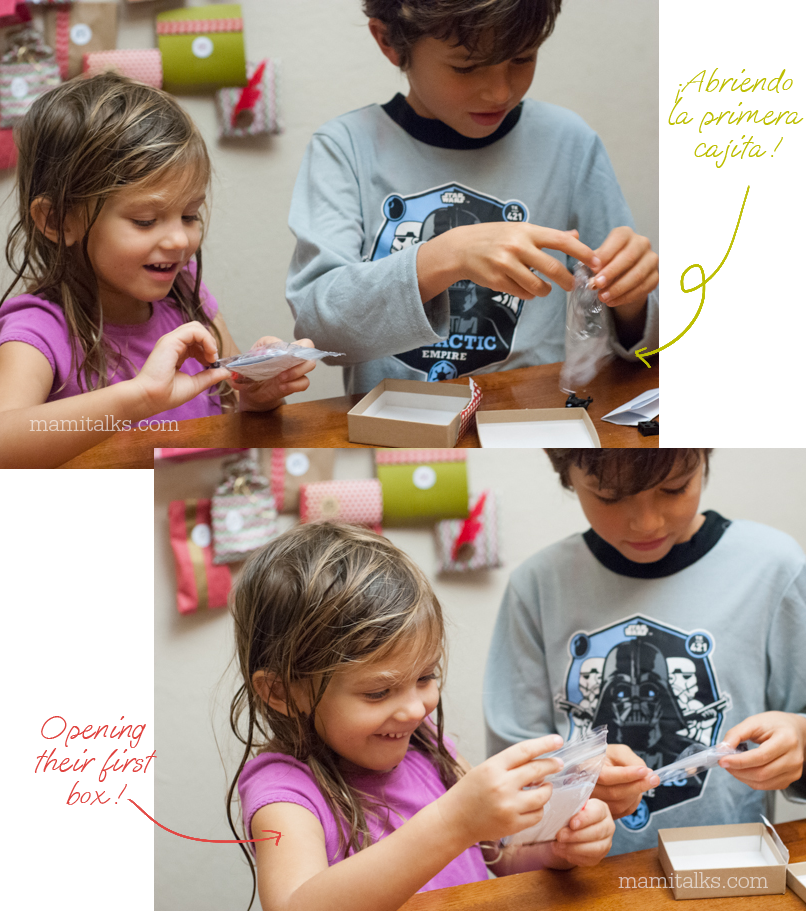
It took me about 3 days to make it because I had to do it after the kids went to sleep and I finally finished it on Dec 2nd but it was ok. It has helped Maya especially so she knows when is Christmas coming, that’s it’s not yet today or tomorrow but until she opens all the gifts. Kind of what the calendar is for right?!
I realized after we made this that Lego has been making Lego Advent Calendars for a while now! This one is cuter and much more fun though! Thanks Karina for letting me make your wonderful calendar!


– ESPAÑOL –
Este es nuestro calendario de adviento. ¡Todos estamos fascinados!
En realidad, yo no había planeado hacer un calendario de adviento este año, ni siquiera comprar uno. En algún momento hemos comprado los que venden en Trader Joe’s con chocolates, pero no me gustan tanto que los niños están ansiosos de comerse el chocolate todos los días en la noche antes de dormir.
Pero hace una semana mi amiga Karina que tiene una tienda de cosas bellísimas hechas a mano de scrapbooking, se llama Mi Tiendita Scrap, publicó el calendario de adviento que ella hizo y eso fué amor a primera vista. Le pregunté qué tenían adentro los regalitos y cuando me dijo me enamoré aún más y por eso decidí hacer uno para Adrian y Maya.


El calendario completo es un juego de Legos, que se divide en 25 bolsitas con la copia de las instrucciones correspondientes incluidas. ¡En realidad los niños no saben lo que el set de Legos es hasta el final!
NECESITARÁS:
- 1, 2 o 3 sets de Legos (dependiendo de la cantidad de niños!)
- Bolsas de plástico ziplock tamaño snack
- Cajitas de todo tipo y papel de regalo o papel de seda
- Cinticas
- Teipe washi para envolver
- Calcomanías de círculos para poner los números
- Marcadores
- Un palo de árbol de verdad
- Spray de pintura o pintura acrílica para pintar la rama
- Hilo estilo Baker’s twine
- Hilo de pescar
- Abrehuecos
COMO HACER EL CALENDARIO DE ADVIENTO
- Separa los sets de Legos que te queden en 25 pasos, puedes usar las bolsitas ziplock cortadas en 2 o en 3, pega los lados y así puedes crear un máximo de 3 bolsas de cada una. Asegúrate de escribir el número de paso en cad bolsita también lo puedes escribir en el folleto de instrucciones.
- Haz copias del folleto de instrucciones y corta las páginas correspondientes a cada uno de los 25 pasos, inclúyelos dentro de cada bolsita.
- Una vez que tengas las 25 bolsitas ya puedes envolverlas! Yo envolví ambas bolsas en un sólo regalo, las distinguí añadiendo un pedacito de teipe washi solamente en la bolsita de Maya. Trata de mantener una paleta de colores solamente. Yo sólo compré un papel de seda navideño y lo complementé con cosas que tenía en la casa, pedacitos de papel y cajitas de regalos que guardo de regalitos que me han dado, así no tienen que gastar mucho en la envoltura, yo incluso usé bolsas de papel y las corté para que fueran chiquitas.
- Para preparar el palo del árbol, aplica un spray del color que quieras o simplemente pinta con un pincel y deja que se seque. Amarra hilo de pescar en cada extremo del palo para que puedas colgarlo por el centro en un gancho en la pared.
- Ahora a colgar los regalos. Abre un hueco en cada regalo que te sea posible y usa el hilo de pescar o el baker’s twine para colgarlo al palo. Hazlo uno por uno mientras que vas viendo que el calendario quede balanceado en cuanto a formas colores y tamaños. Cuando no puedas abrir un hueco en los regalos puedes envolver el hilo de pescar alrededor las cajitas, así agarrará la caja entera y no se va a ver porque es bien delgadito.

Me tomó unos 4 días en total para terminarlo porque tenía que hacerlo después de que los niños se acostaran y finalmente lo terminé el 2 de diciembre. Le ha ayudado a Maya especialmente porque ahora no pregunta tanto si hoy o mañana es Navidad, ya sabe que hasta que abra todos los regalitos es Navidad. Que bueno, para eso son los calendarios de adviento no!!?
Después de que lo hicimos me di cuenta que Lego ha estado haciendo calendarios de adviento desde hace un tiempo! Los venden en una caja especial y todo. Pero éste que hicimos es más lindo y ¡mucho más divertido! Gracias Karina por dejarme hacer su calendario hermoso!