

One of the fun things I did for my sister’s wedding was a photo booth. I have seen them all over and I thought, there has to be one there! It is so much fun to be in an event and take pictures using props, I just love it.
So, I got myself into the task.
I researched some ideas of backdrops, because this wedding photo booth is for people to get in there and take the pictures themselves with their own cameras, mainly a backdrop. My sis said that at her mother in law’s house there might be a clothes’ hanger or something else we could use to hang the backdrop so I only made a backdrop and brought props but her MIL had some very cool additions that made the photo booth so great.

Making the Wedding Photo Booth
- For the backdrop I followed the tutorial from 100 Layer Cake. It’s made with crepe paper.
- To make the streamers they recommend to get the ones that are folded in sheets and not the ones that come in a roll because it is easier to cut them but I had to buy the roll ones since I didn’t have time to order online.
- I got supplies at Party City, Dollar General and Michael’s where I go the metallic gold fringe (that gave it a great touch!)

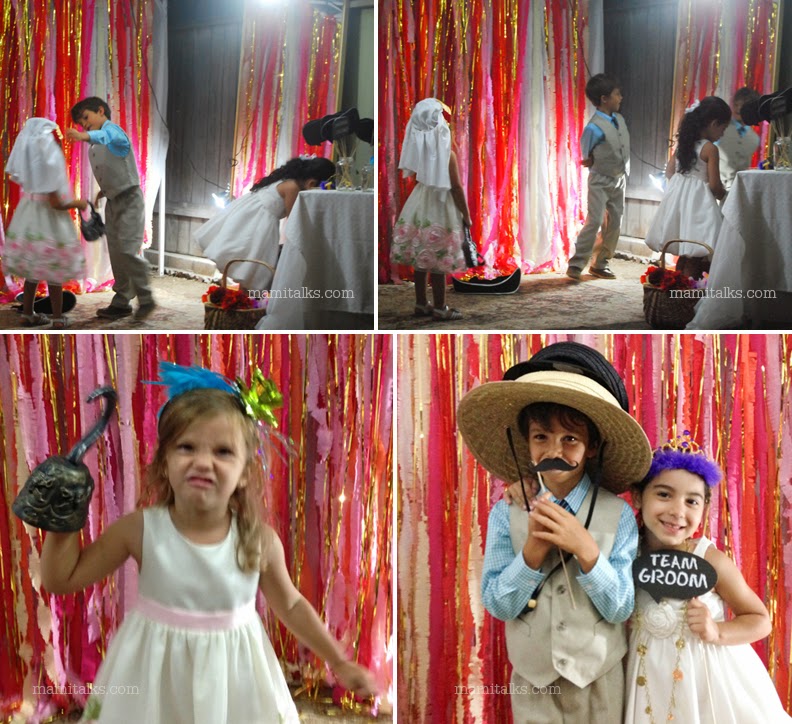
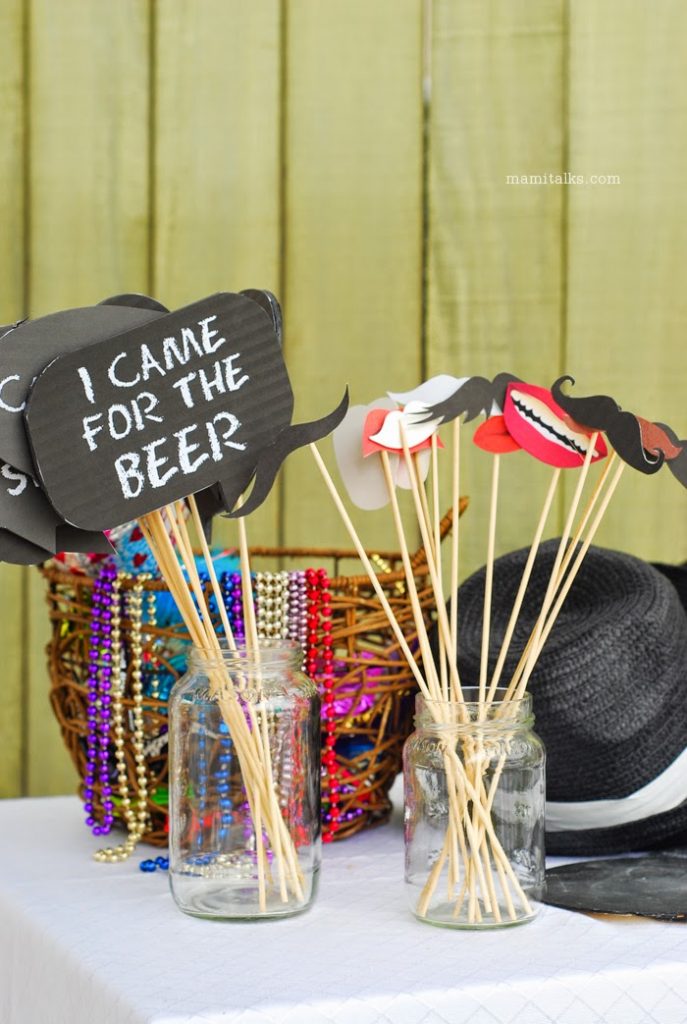
- I got masks, hats and any props where I could in those same stores and I printed myself the mustaches and talkie bubbles.
- We used a 10′ x 10′ tent to accommodate the photo booth, it worked perfectly!
- The backdrop streamers were hanged with tape one by one (I didn’t use hot gun like the tutorial says).
- A white curtain was used on the back of the streamers to cover the back.
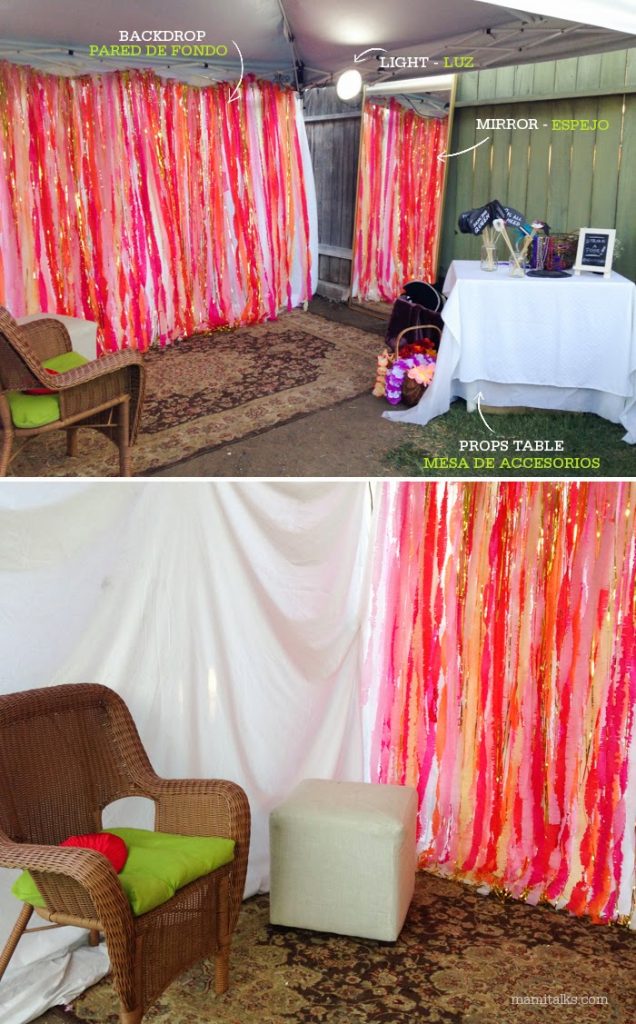
- The best part that helped so much where all the add-ons that were available at the house: A huge mirror, more props (from Halloween costumes!), nice chairs, a huge rug, and white sheets to cover the other side.
- I also brought some light reflectors (3 in total were used) for night time, we pointed them out to the sides.
Most of the photos were taken by the amazing photographer for the wedding, my sister’s friend: Bernie (Bernie Dickson Photo), I indicated in the post which are her pictures. (Later I will show you in another post some special wedding photos I took of the bride and groom!)

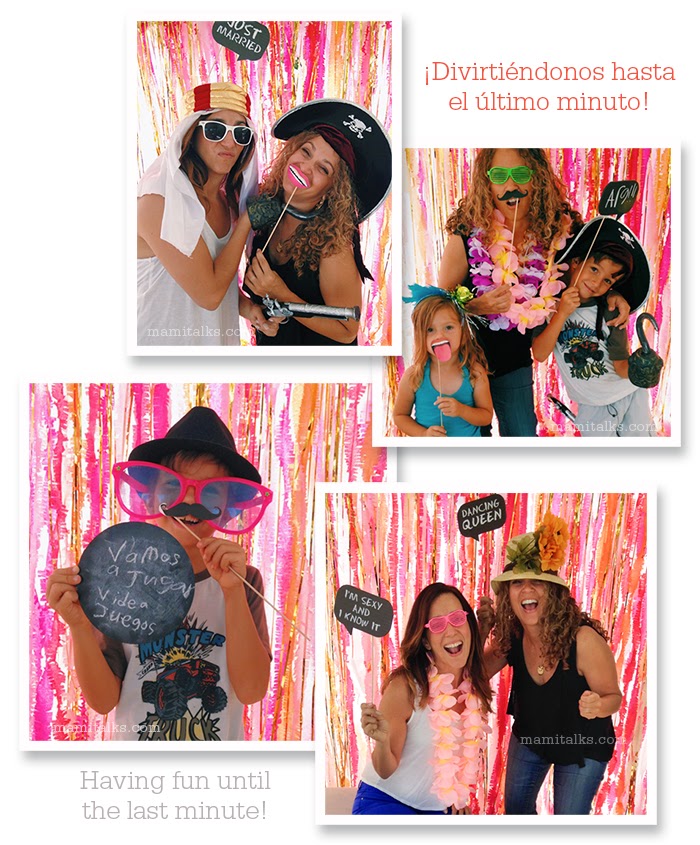
This was definitely another highlight of my sister’s wedding that I enjoyed so much preparing and any minute I had, I wanted to get over there and take more photos. Even the day after used it a lot before taking it down.
There were also little chalkboards to write your own message and Adrian was so cute writing on them!

– E S P A Ñ O L –
Una de las cosas chéveres que hice para la boda de mi hermana fué una cabina de fotos (photo booth). Yo los he visto mucho en Pinterest y pensé, ¡tengo que hacer uno allá! La verdad es muy divertido estar en un evento o fiesta y tomarse fotos con props, me encanta.
Así que me puse la tarea yo misma y empezé.
Investigué algunas ideas para hacer el fondo (backdrop), ya que esta cabina de fotos de boda es del tipo que la gente se tome fotos con su propia cámara, lo más importante era crear un fondo bonito. Mi hermana me dijo que en la casa de su suegra (donde fué la boda) probablemente había uno de esos guindaderos de ropa o cualquier otra cosa que pudiéramos utilizar para colgar el fondo por lo que sólo me puse a hacer el fondo y a llevar props pero la suegra de mi hermana tenía muchísimas cosas más que ayudaron a que la cabina de fotos fuera un éxito.

Haciendo el Photo Booth (Cabina fotográfica) para la boda
- Para hacer el fondo seguí el tutorial de 100 Layer Cake. Está hecho con papel crepé.
- Para hacer las serpentinas recomiendan ahí comprar los que vienen en hojas dobladas, y no los que vienen en rollos porque son más fáciles de cortar. Yo tuve que comprar los rollos ya que no tenía tiempo de pedir los grandes por internet, así que me tardé más preparándolos pero salieron bien y también tuve muy buenas ayudantes!
- Yo conseguí las serpentinas o papel crepé en Party City, Dollar General y en Michael’s en donde compré las tiritas metálicas doradas (¡que le dieron un super toque especial!)
- Compré máscaras, sombreros y cualquier prop que encontré en estas mismas tiendas, también imprimí yo misma los bigotes y las burbujas de diálogo.
- Usamos un toldo que había en la casa de 0 ‘x 10’ para la cabina de fotos, ¡funcionó perfectamente!
- Las serpentinas para el fondo las pegamos con teipe o cinta adhesiva (no usé la pega de silicona como dice el tutorial).
- Usamos una cortina blanca en la parte de atrás de las serpentinas para cubrir mejor.
- La mejor parte que ayudó muchísimo fueron todas las cosas que estaban disponibles en la casa: un espejo enorme, más props (sacados de disfraces de Halloween), sillas bonitas, una alfombra grande y sábanas blancas para cubrir el otro lado.
- También me llevé algunos reflectores de luz (3 en total) para la noche, las apuntamos a los lados.
La mayoría de las fotos fueron tomadas por la fotógrafa excelente de la boda, la amiga de mi hermana: Bernie (Bernie Dickson foto), yo las indiqué con su nombre a las fotos de ella aquí en este post. (En un próximo post les enseñaré unas fotos especiales que yo les tomé a los novios aparte de la fiesta)
Esto fue sin duda otro de los highlights de la boda de mi hermana que tanto disfrutamos, en cualquier momento que tenía me iba para allá a tomarme más fotos e incluso al día siguiente antes de quitar la cabina ¡la aprovechamos a lo máximo!
¡Ah! Y también puse pizarrones chiquitos para escribir el mensaje que uno quisiera y Adrian se la pasó escribiendo varios, ¡muy cuchi!
4 Comments
Mari Corona
July 23, 2014 at 12:29 amGreat share love the idea!!!!!
dcruz
July 30, 2014 at 9:13 amThank you!!
Elvira
July 23, 2014 at 3:22 amFue un exito, siento que yo he debido tomarme mas fotos. Todas estan super. Felicitaciones, este photo boost te quedo de contrato!!!!!!!!!!
dcruz
July 30, 2014 at 9:14 amVerdad que si, no pareciste casi en el photo booth!