
![]()
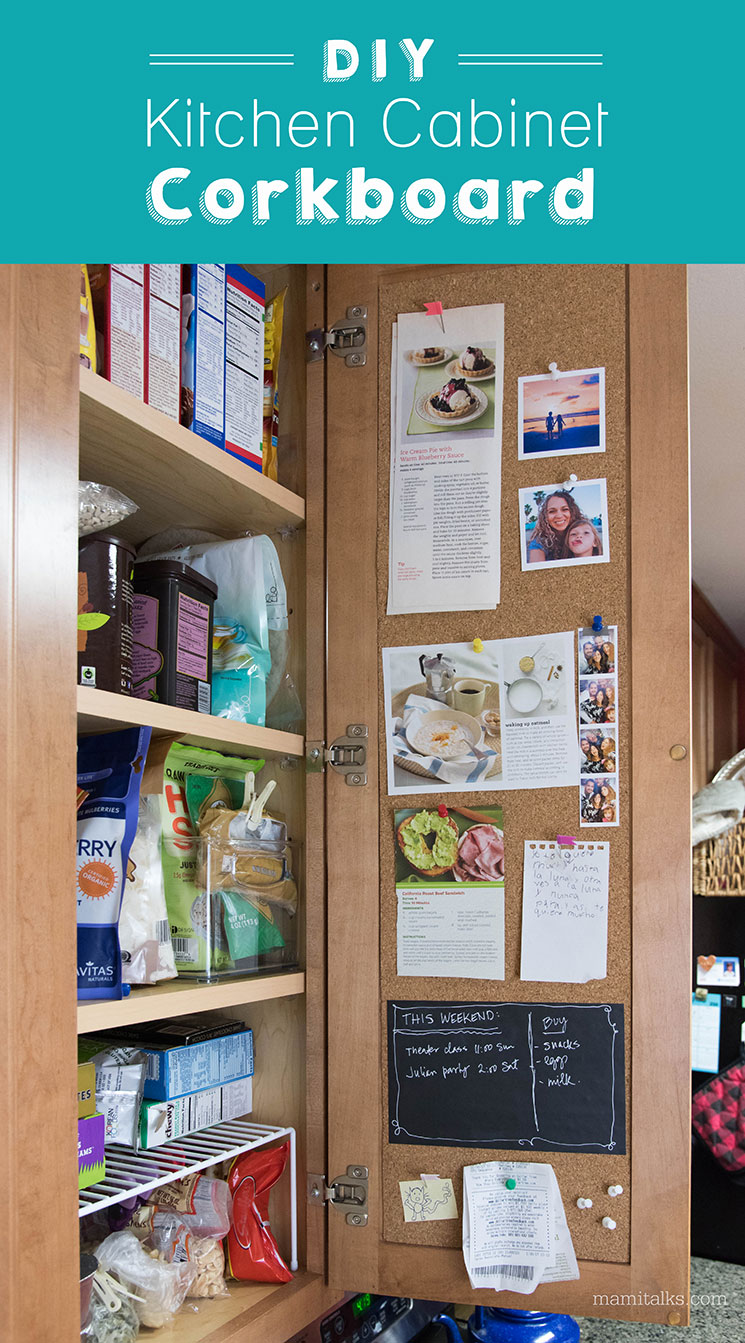
Today I’m sharing the last Spring Cleaning tip! I am cleaning the kitchen cabinets and making a Kitchen Cabinet Corkboard to help us (meaning me!) stay organized.
I’m so happy I finally made this because it has been something I wanted to make for years, and I am ready to show you how so you can make it too!
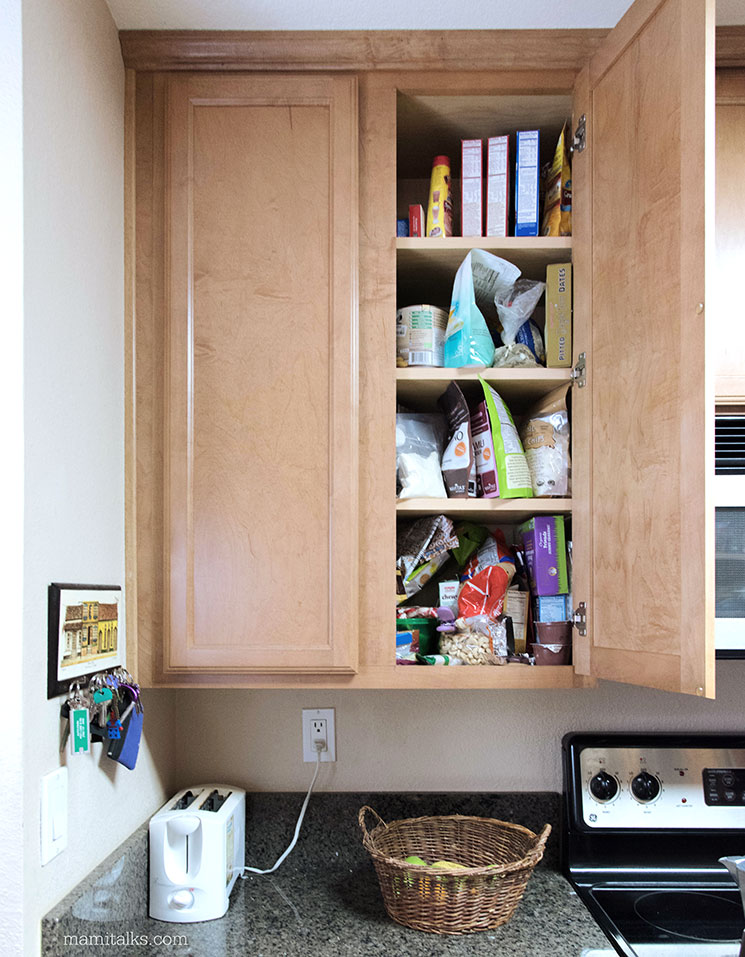
First of all, check out my cabinet mess. It was getting out of control! Of course, the very first step is getting all the products out, throw away anything that is too old and keep only what you will really use.
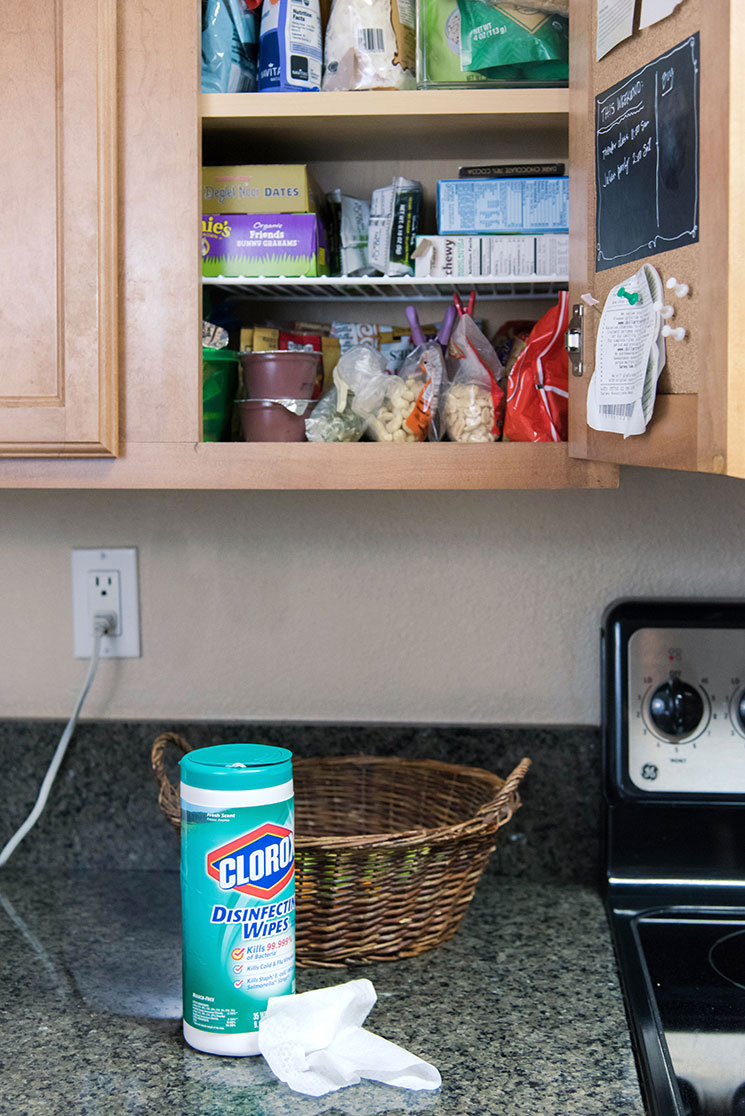
Once all of the products are removed, you can clean inside the cabinets with Clorox® Disinfecting Wipes. As you know, they kill germs and bacteria and remove kitchen grease and lots of other dirty thingies you find in there. I also used Clorox® Disinfecting Wipes with MicroScrubbers – they have all the same disinfecting powers and are textured to help pick up tough messes.
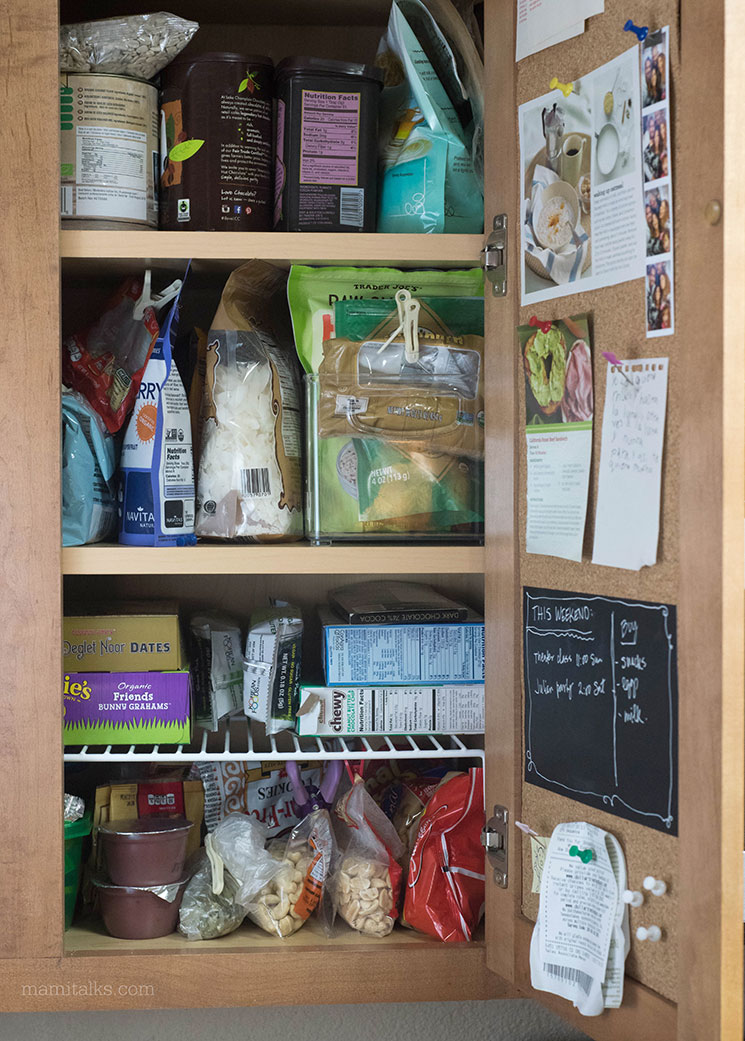
Before getting the products back inside the cabinet I got some organizers, plastic shelves and transparent drawers (I actually need to get more, I just didn’t find the size). They help out to organize all those packets.

After everything is clean and organized it’s time to make the Kitchen Cabinet corkboard!
You will need the following supplies:
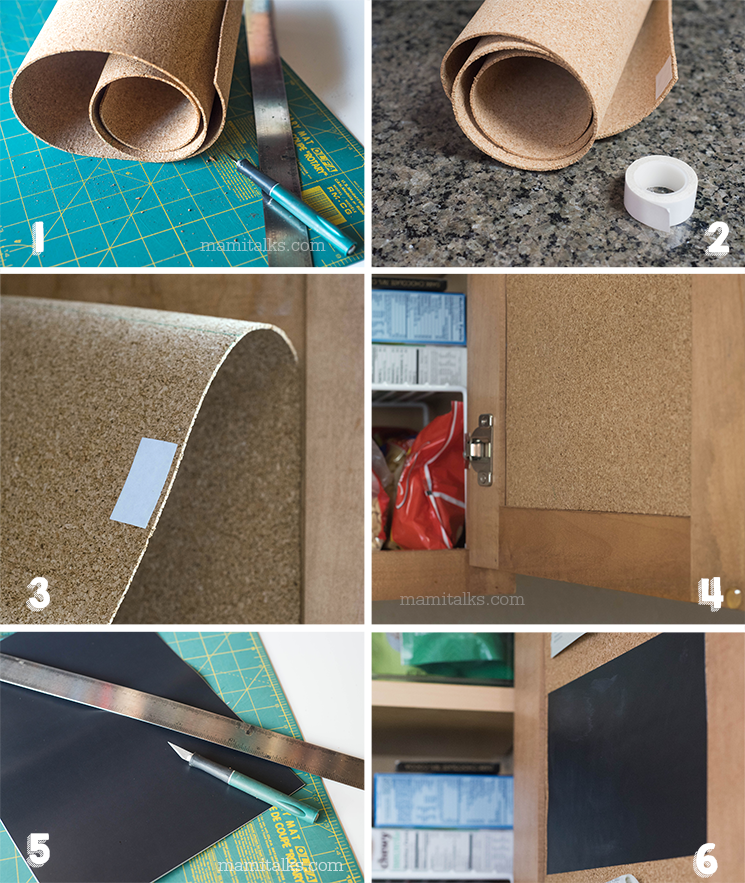
- A roll of cork or Cork tiles (depending on the size of your cabinets)
- Craft knife
- Strong adhesive
- Chalkboard stickers (optional)
Instructions:
- Cut the cork to the exact size of your cabinet with the craft knife.
- Add tape to all the borders and corners on one side of the cork.
- Stick the cork to the back of the cabinet.
- Let it sit for a while to make sure it will last (I had to try with different tapes, cork doesn’t work with flimsy tapes)
- OPTIONAL: Cut a rectangle piece of the chalkboard sticker (A circle can work too!)
- OPTIONAL: Stick it to the corkboard for an extra fun touch!
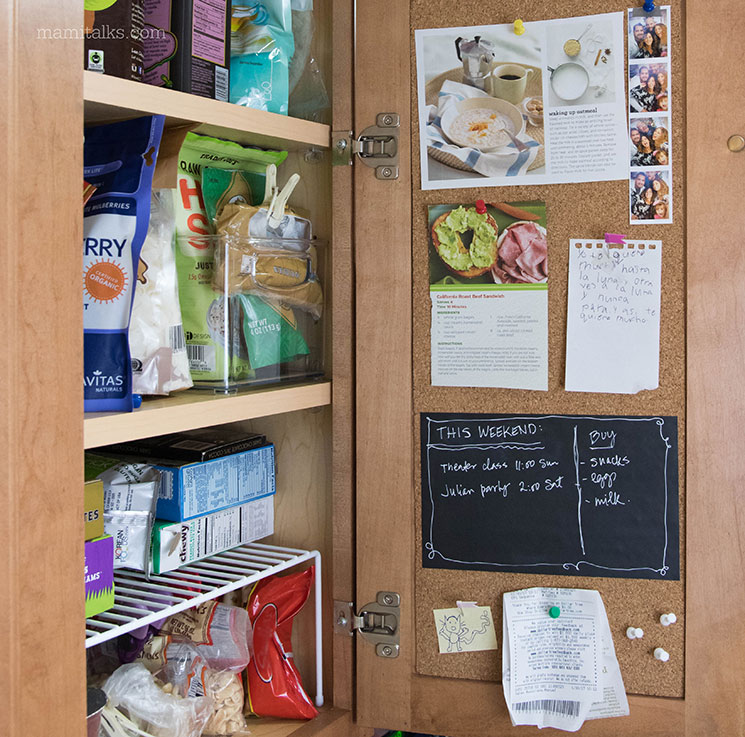
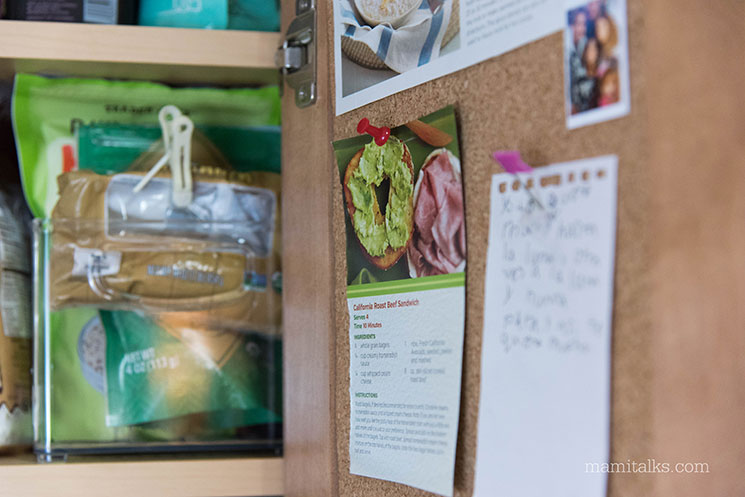
The corkboard is useful to have in the kitchen for any recipes you want to remember out of magazines, to save any notes and keep some memories. I love to pin receipts that I’m not ready to throw away too!
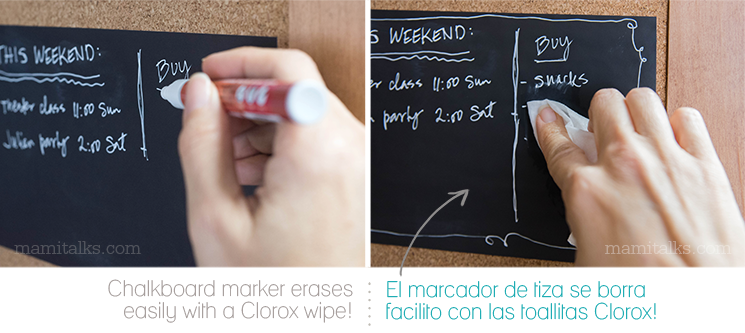
If you make the chalkboard addition, I recommend using a chalkboard marker. You can easily erase the marker with Clorox wipes since they don’t have bleach, and write again and again!
What do you think of the result? I love the end result and how useful it is in the kitchen, everything is clean and organized, yay!!
For more spring cleaning tips, trick and life hacks, visit SeasonOfClean.com.
-ESPAÑOL-
HAZLO TU MISMA: CORCHO EN EL GABINETE DE LA COCINA
¡Hoy estoy compartiendo el último tip de limpieza de primavera! Estoy limpiando los gabinetes de la cocina y puse una cartelera de corcho en un gabinete para ayudarnos (a mi mas que todo!) a mantener el orden.
Estoy tan contenta de que finalmente hice esto porque desde hace años lo quería hacer, y estoy lista para mostrarles cómo lo hice ¡para que ustedes también lo puedan hacer!
En primer lugar, vean que desastre de gabinete. ¡Ya estaba fuera de control! Por supuesto, el primer paso es sacar todos los productos, botar cualquier cosa que sea demasiada vieja y dejar sólo lo que realmente se usa.
Una vez que saquen todo, pueden limpiar los gabinetes por dentro con las toallitas desinfectantes Clorox®. Como saben, matan gérmenes y bacterias y quitan la grasa de la cocina y muchas otras cosas sucias que se acumulan ahí adentro. También usé las toallitas desinfectantes Clorox® con MicroScrubbers – tienen todas las mismas potencias desinfectantes y están texturizadas para ayudar a recoger los desastres más difíciles.
Antes de volver a meter productos en el gabinete puse algunos organizadores, estantico de plástico y una cajita transparente (que realmente necesito más de estas pero no he encontrado el tamaño). Ayudan mucho a mantener organizados todos esos paquetes.
Después de que todo esté limpio y organizado es hora de hacer la cartelera de corcho en el gabinete de la cocina.
Necesitarán los siguientes materiales:
- Un rollo de corcho o pedazos de corcho (dependiendo del tamaño de sus gabinetes)
- Cuchilla de manualidades
- Cinta adhesiva (teipe) fuerte
- Papel de pizarrón (opcional)
Instrucciones:
- Cortar el corcho del tamaño exacto de tu gabinete con la cuchilla.
- Añade la cinta adhesiva a todos los bordes y esquinas en un lado del corcho.
- Pega el corcho en la parte de adentro del gabinete.
- Déjalo tranquilo un rato para asegurarte de que no se va a caer (yo tuve que probar con diferentes teipes, el corcho no funciona con cualquier tipo de teipes delgaditos)
- OPCIONAL: Corta un rectángulo del papel de pizarrón (¡Un círculo también puede funcionar!)
- OPCIONAL: ¡Pégalo al corcho y le dará un toque divertido adicional :)!

Es super útil tener el corcho en la cocina para colocar cualquier receta de revistas que uno quiera hacer, o para guardar noticas y algunos recuerditos. A mi me encanta guindar los recibos que todavía no quiero botar a la basura.
Si hacen el pizarroncito, les recomiendo usar un marcador de esos especiales de pizarra. Pueden borrar fácilmente el marcador con toallitas de Clorox ya que no tienen cloro, y escribir una y otra vez!
¿Qué piensan del resultado? A mi me encanta el resultado final y lo útil que es en la cocina, todo está limpio y organizado, ¡yei!
Para más consejos de limpieza de primavera y truquitos útiles visiten SeasonOfClean.com.
No Comments