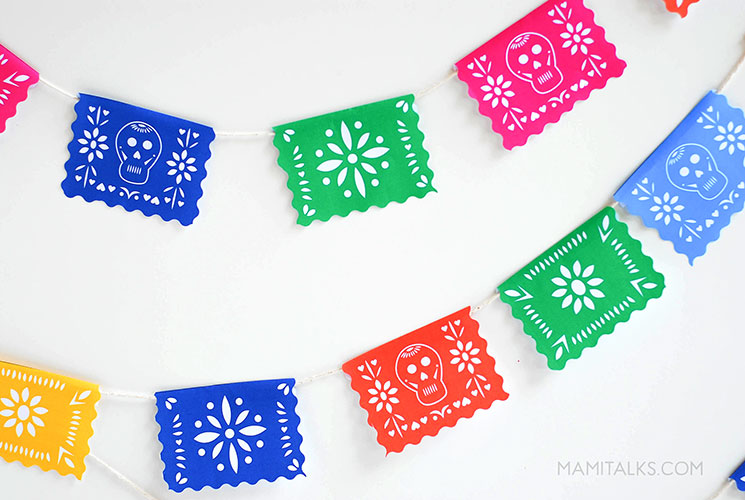
Making something in a mini size is always fun and so cute! I like to make mini versions of everything, including recipes. That’s how I thought about making this printable papel picado garland.
This one is especially simple because there is no need to cut the insides, it looks like it’s cut like regular papel picado but it’s really not!
The trick is to use decorative scissors.
So if you already have a color printer, cardboard and decorative scissors at home, you can make your garland today!
MINI PRINTABLE PAPEL PICADO GARLAND
SUPPLIES
- Letter size white cardboard for printing
- Decorative scissors (Other samples: 1 and 2)
- Regular scissors
- Lightweight cord
- Tape
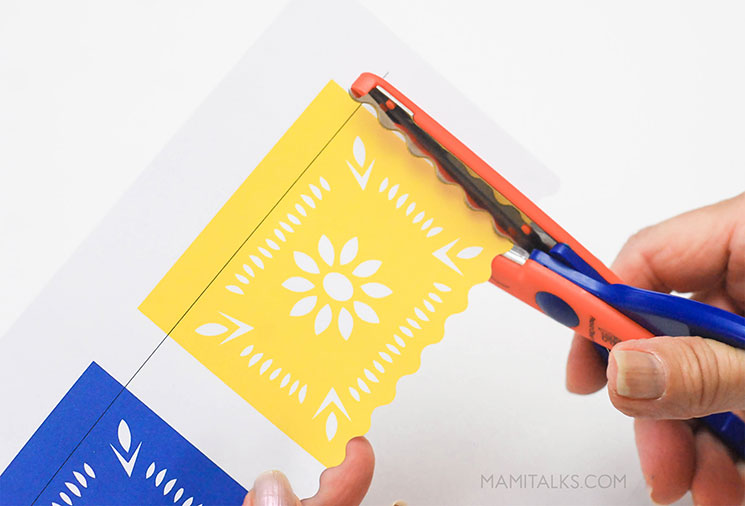
INSTRUCTIONS:
- Download the printable papel picado templates here and print them.
- Cut around 3 edges (sides and bottom) of all the designs with the decorative scissors and cut around the top with regular scissors. *IMPORTANT: leave the black line inside the design!

- Fold along the black line
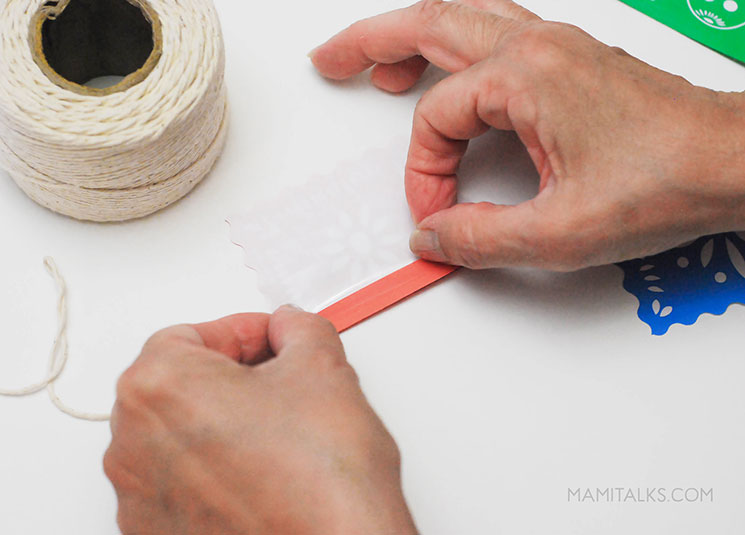
- Place the cord inside the fold and tape the slip to the back.
- Measure a distance you would like to place the next printable papel picado and repeat the last step as many times you want depending on the size you would like your garland to be.
This mini garland looks great anywhere!
Youn can see how I added it to our altar one time and at the end of the post check out how it looked on the classroom altar. If you want bigger papel picado templates that you have to cut for real, I download them here.
There are many possibilities! Enjoy!

-ESPAÑOL-
MINI PAPEL PICADO: HAZ UNA GUIRNALDA
Hacer algo en tamaño mini siempre es divertido y tan cuchi! A mi me gusta hacer versiones mini de todo, hasta recetas. Así que pensé en hacer esta guirnalda de papel picado mini porsupuesto.
Este proyectico es bastante sencillo porque no hay necesidad de cortar por dentro, pareciera que está cortado como un papel picado normal pero realmente no!
El truco es usar tijeras de piquito o tijeras decorativas.
Así que si tienen una impresora a color, cartulina y tijeras de piquito en casa, la pueden hacer hoy mismo!
COMO HACER UNA MINI GUIRNALDA DE PAPEL PICADO
MATERIALES:
- Cartulina blanca tamaño carta para imprimir
- Tijeras decorativas (Otros ejemplos: 1 y 2)
- Tijeras normales
- Cuerda
- Cinta adhesiva o teipe

INSTRUCCIONES:
- Descarga aquí las plantillas imprimibles de papel picado e imprímelas en cartulina blanca.
- Corta alrededor de 3 bordes (los lados y borde de abajo) de todos los diseños con las tijeras de piquitos y corta el borde de ariba con tijeras normales. * IMPORTANTE: ¡Deja la línea negra dentro del diseño!

- Dobla en la línea negra de cada diseño.

- Coloca la cuerda dentro del pliegue y pega con teipe en la parte posterior.
- Mide una distancia a la que le gustaría colocar el siguiente mini papel picado y repite el último paso cuantas veces como quieras dependiendo de lo largo que quieras la guirnalda.
¡Esta mini guirnalda se ve muy linda en cualquier lugar!
Pueden ver cómo la guindé en nuestro altar la otra vez y también como se veía en el altar del colegio aquí abajo. Si quieres más plantillas de papel picado donde tienes que cortar de verdad verdad, las puedes encontrar aquí.
¡Hay muchas posibilidades con esta mini guirnalda! ¡Espero les guste!
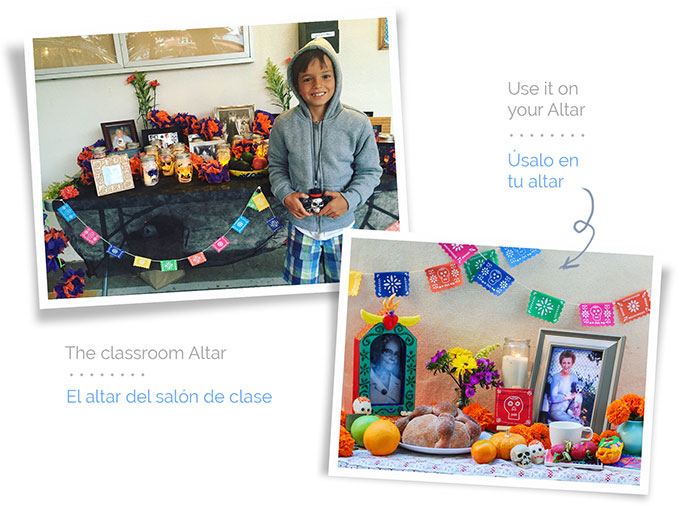
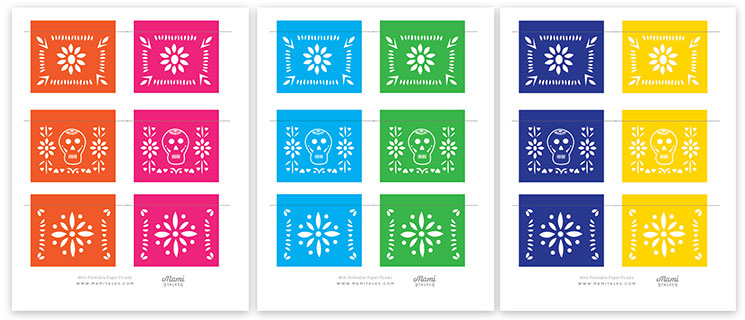
Click on this image to download the printable papel picado templates.
Dale click a la foto para descargar la plantilla de papel picado.

6 Comments
Alma Nino
March 22, 2019 at 8:39 pmThank you for posting this. These are absolutely adorable!
Dariela Cruz
April 4, 2019 at 10:46 amYou are very welcome, glad you like them!
CECILIA COSTILLA
October 23, 2019 at 11:14 amESTAN SUPER BONITOS!
GRACIAS POR COMPARTIRLO EN TU BLOG !
Dariela Cruz
October 23, 2019 at 2:11 pmDenada! Y gracias por visitarme 🙂
Martha Alvarado
June 3, 2022 at 8:53 amGracias. Lo voy a imprimir para Topper de pastel
IRENE
October 27, 2022 at 7:20 amWAOOO… MUY PRACTICO Y LINDOS… SALUDOS