
![]()
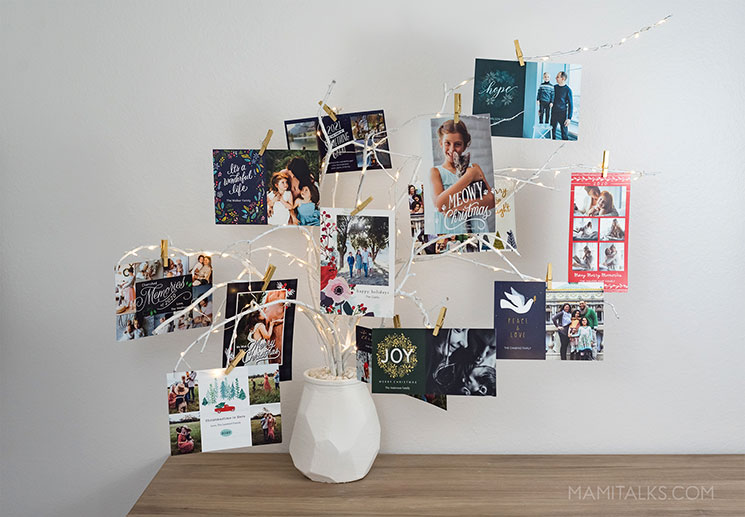
Holidays are almost here and I’ve created this DIY holiday card display with Walmart Photo that I think is going to be a hit this year!
This Christmas might be different for many of us in the whole world, oh 2020!! Many won’t be able to travel to get together with family as usual or the celebrations might change, nothing is the same…
Except… We still have family, friends and we are still connected no matter what!
It feels special to be able to send a handwritten message to our loved ones letting them know that we are thinking about them plus what a treat it is to receive cards in the mail!
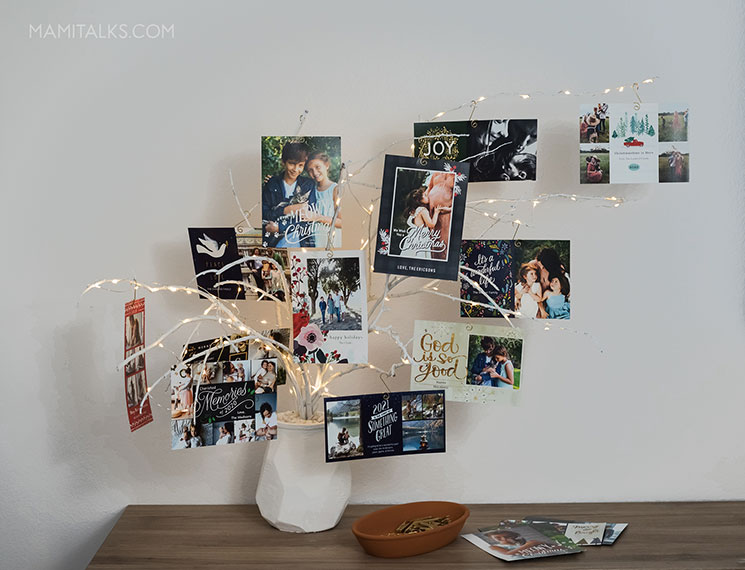
That’s why displaying holiday cards in a prominent space in our house will be such a treasure. It’s a great way to keep in touch and feel connected looking at those familiar faces all day don’t you think?

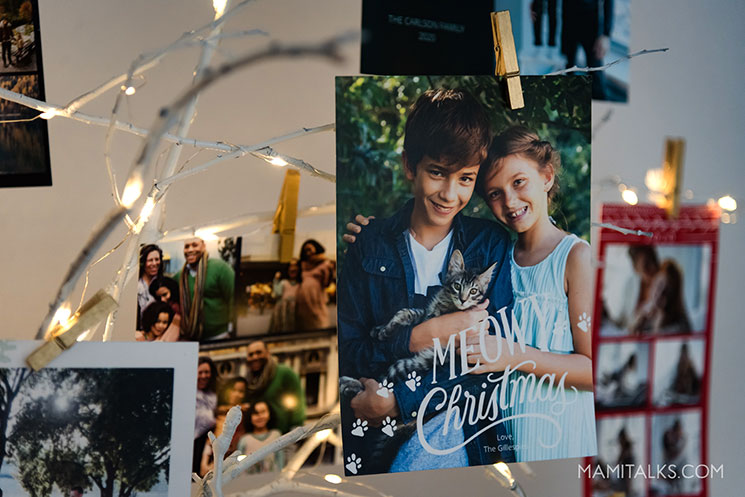
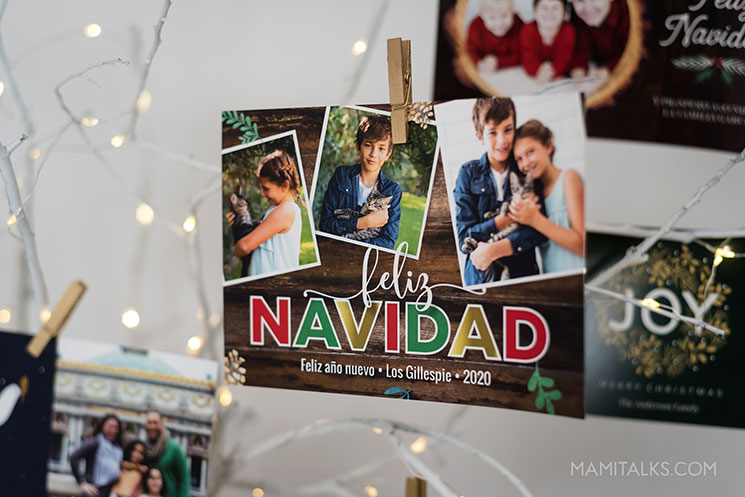
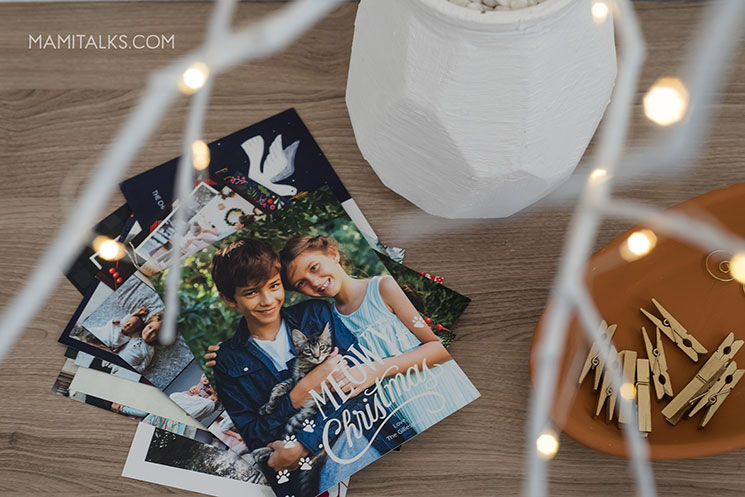
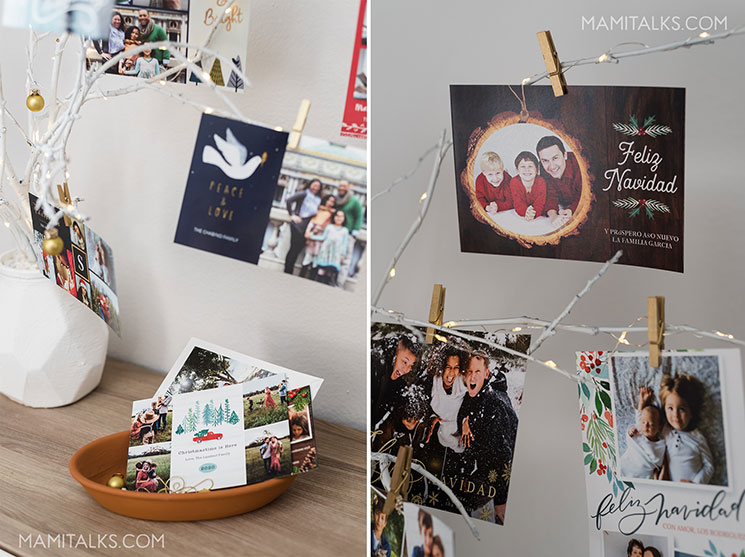
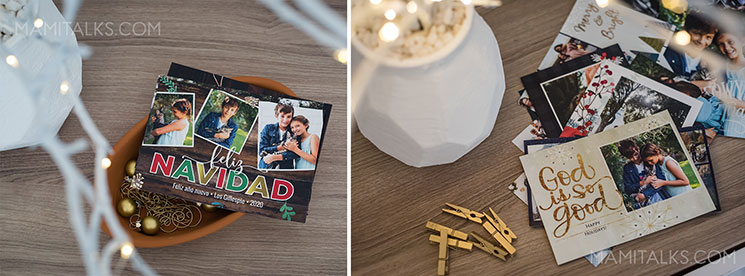
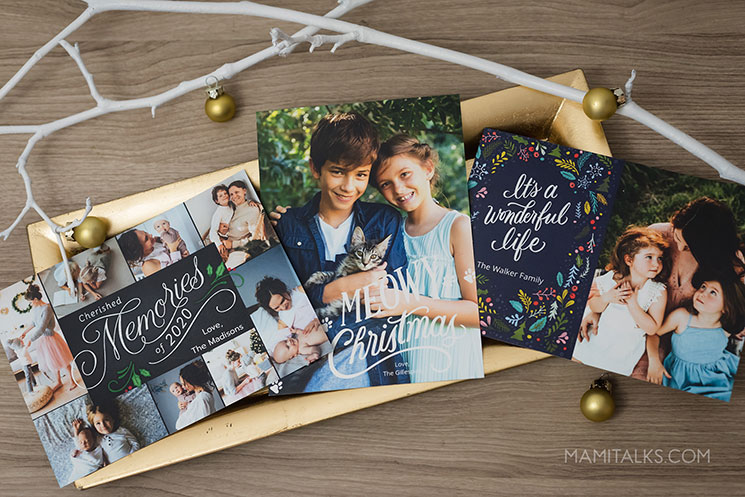
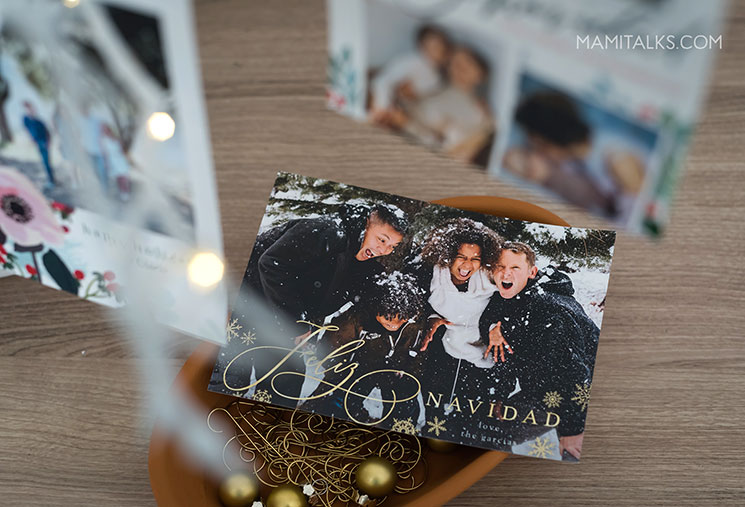
Walmart Photo has a great selection of Christmas and Holiday cards that can be printed the same day, my order was ready in 4 hours.
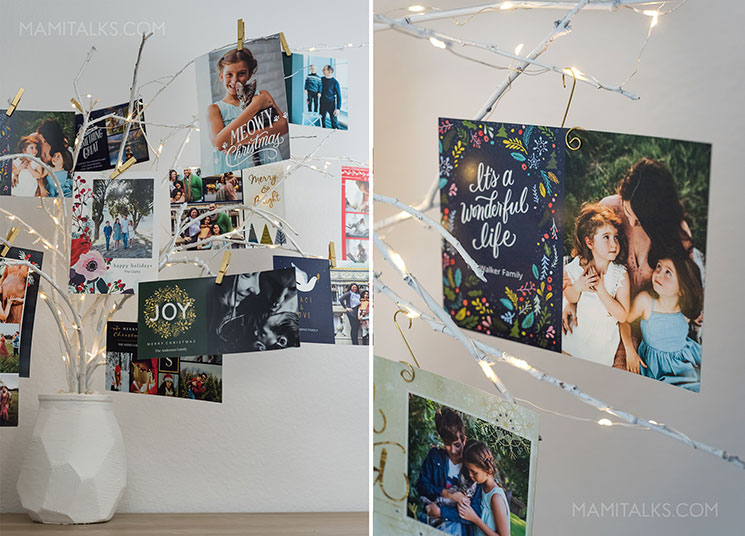
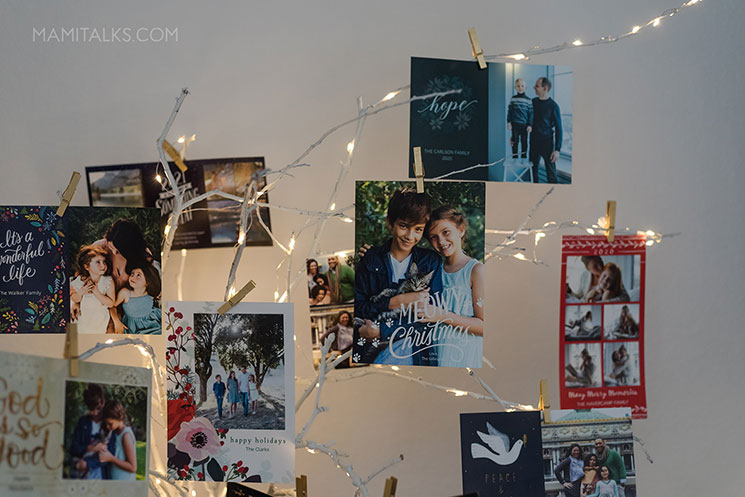
All the cards in this post are design templates from Walmart Photo. My favorite one is the one that says Meowy Christmas, we just adopted a kitten and we are in LOVE with him, especially the kids, so I thought it suited us so well, I took the corresponding photos to go with it, and voilà!
The cards are printed on both sides so you can add more photos and text in the back, I recommend printing on premium card stock. There is also a selection of cards in Spanish which you can find here.

DIY HOLIDAY CARD DISPLAY
SUPPLIES:
- A vase you don’t mind painting
- White craft paint (water-based)
- Baking powder
- Medium size brush
- Natural branches
- White spray paint
- Small clothespins or ornament hooks
- Fishing line or thin white cord
- A little piece of white fabric scrap, felt, or piece of plastic bag
- Medium size rocks for weight
- Small white rocks
- LED shimmer string lights (About 30 feet)
INSTRUCTIONS:
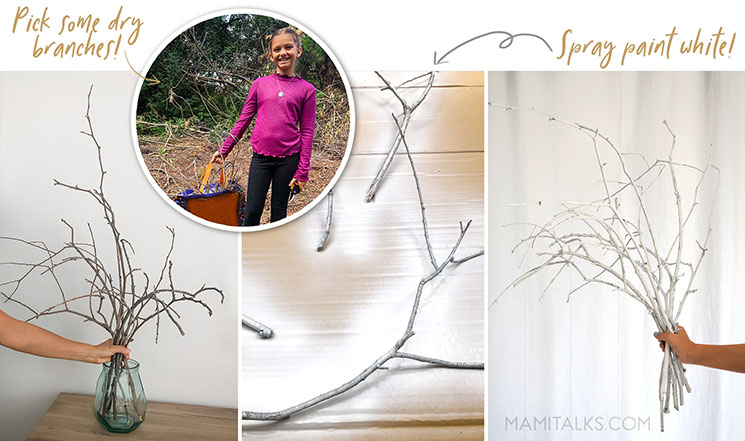
1. Pick natural dry branches (kids will love to help with this!) and spray paint them white.
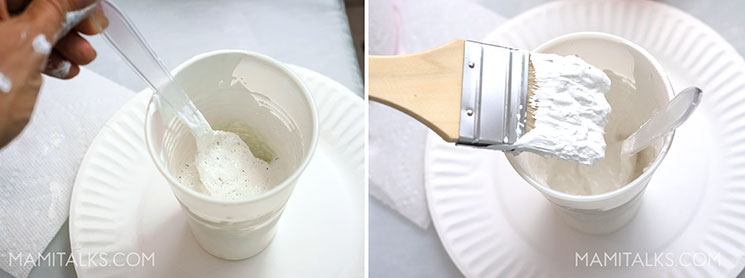
2. Mix about one cup of paint with 1 teaspoon of baking powder, it will make the paint foamy, add more baking powder little by little if you want more texture.
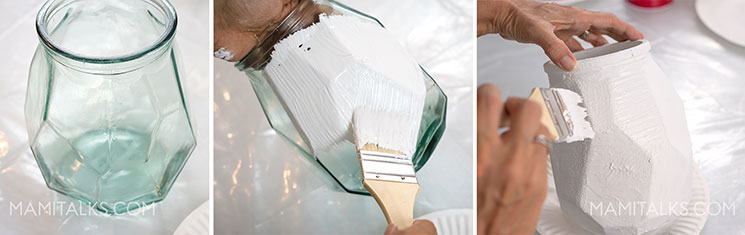
3. Load up the brush with a lot of paint in the brunch and cover the vase with a thick coat, let it dry, and do a second coat if needed. Make sure to paint the inside too.
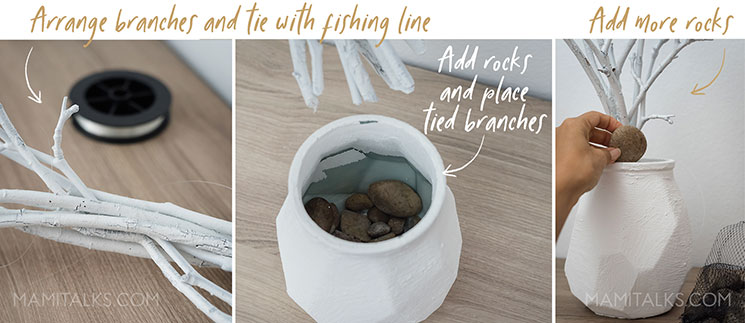
4. Arrange the branches in the vase how you think you will want them to sit and tie them with a fishing line.
5. Add some rocks to the bottom, place the bundle of branches in the middle within the rocks.
6. Add more rocks to the sides so the branches stay in the middle of your vase. NOTE: Leave space for the light’s battery pack!

7. Hide the battery light pack inside the vase and wrap the string of lights around your branches.

8. Cut pieces of felt (or scraps of white fabric or even white plastic) and cover the rocks and battery pack.
9. Top with decorative rocks or mini pearls, ornaments, whatever you prefer!
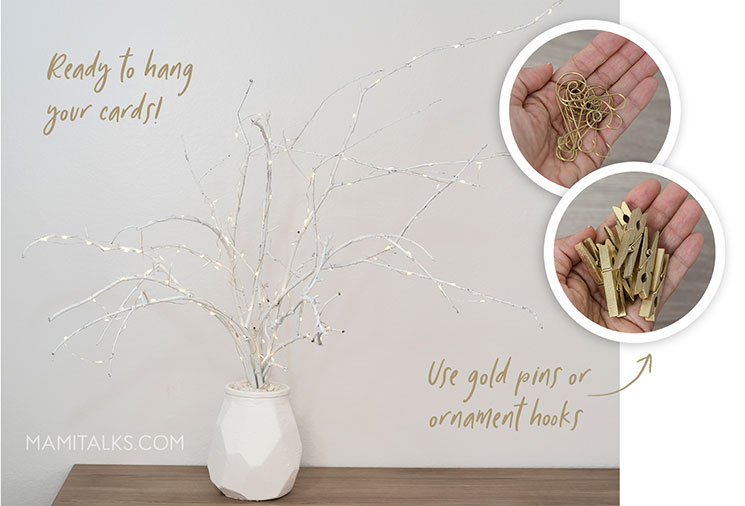
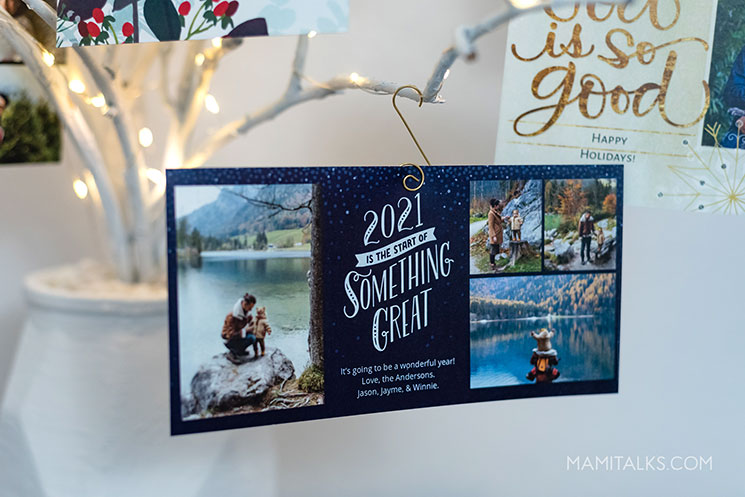
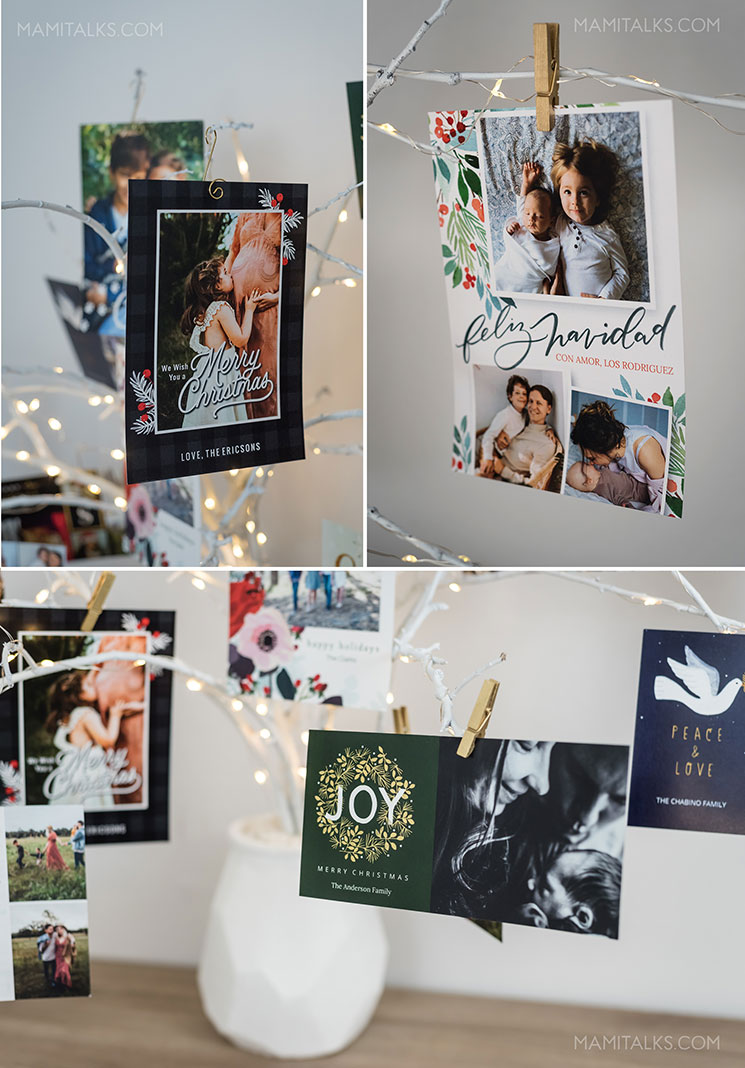
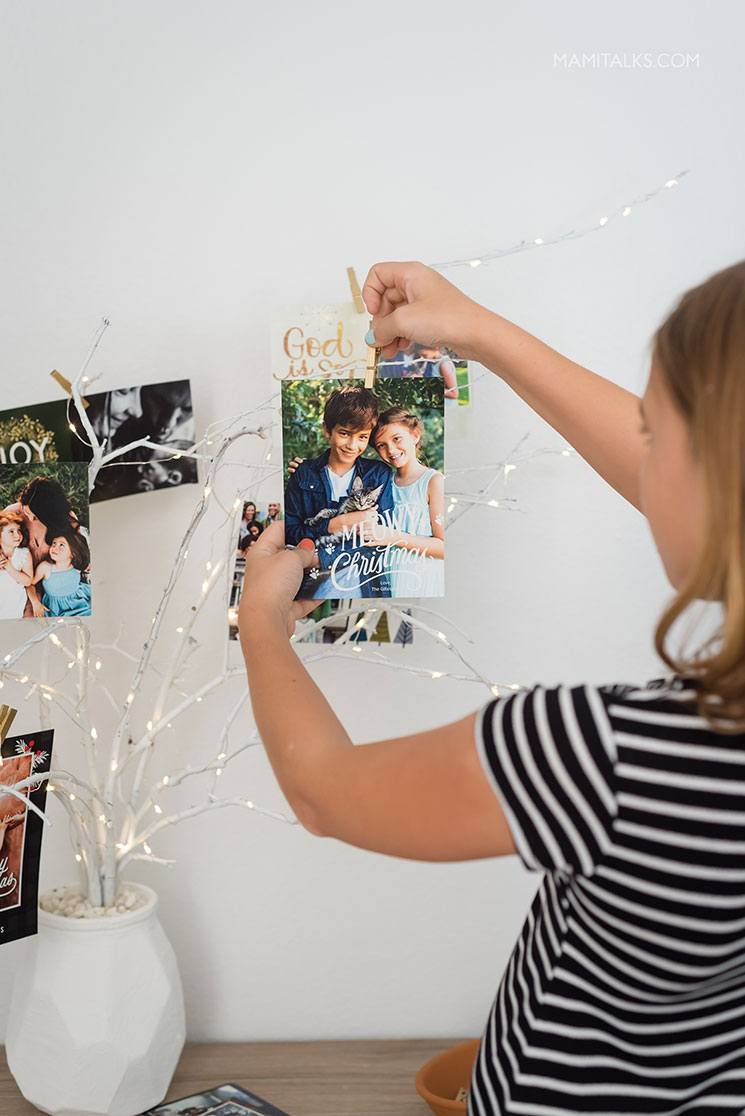
10. The holiday card display is ready so you can hang your cards. Use clothespins or any cute ornament hooks to hang them!
Start making this card display now so you are ready to decorate with your unique family and friend’s cards and don’t forget to order yours so they can also keep you close these holidays!
EXTRA TIPS AND IDEAS
- I love the simplicity of white and gold, that way the cards stand out. But you could choose any color you want, just make sure to include the twinkle lights!!
- Add mini ornaments that match, maybe kids will love to hang those.
- Use the lights string to clip your cards too (sometimes the branch might be too thick).
- You can also use faux branches that are already treated and look natural and wintery.
- When looking for vases, try to pick the heaviest one with a narrow mouth, it will make it easier for this project.
- If you don’t find gold clothespins, just spray paint them gold.
- Leave a tray with the pins by your display so when a new card comes it’s easy to hang.
- Keep in mind the photo cards always print with a little more contrast than the original picture.
-ESPAÑOL-
TUTORIAL PARA UN PORTA TARJETAS DE NAVIDAD
Las Navidades ya casi están aquí y por eso he creado este porta tarjetas navideñas con Walmart Photo que creo que será un éxito este año!
Esta Navidad probablemente será muy diferente para muchos de nosotros en todo el mundo, ¡Ay 2020! Muchos no podrán viajar para reunirse con sus familias como de costumbre o las celebraciones puede que cambien, nada es igual …
Excepto … ¡Todavía tenemos familia, amigos y queremos seguir conectados con todos!!
Se siente especial poder enviar un mensajito escrito a mano a nuestros seres queridos haciéndoles saber que estamos pensando en ellos y ¡qué rico es recibir tarjetas por correo también!
Así que por eso tener un espacio especial en la casa donde exhibimos nuestras tarjetas de Navidad me parece muy bonito. Es una manera excelente de mantenerse en contacto y sentirse conectado viendo todas las caras de la gente querida todo el día, ¿no less parece?
Walmart Photo tiene una gran selección de tarjetas navideñas que se pueden imprimir el mismo día, mi pedido estuvo listo en 4 horas.
Todas las tarjetas que pueden ver en este post son plantillas de diseño de Walmart Photo. Mi favorita es el que dice Meowy Christmas, nosotros acabamos de adoptar un gatito y estamos ENAMORADOS de él, especialmente los niños, así que pensé que ese diseño estaba perfecto paara nosotros, tomé las fotos correspondientes para usarla, ¡y listo!
Las tarjetas están impresas en ambos lados para que puedan agregar más fotos y texto en la parte posterior, yo les recomiendo imprimir en cartulina premium. También hay una selección de tarjetas en español que puede encontrar aquí.
PORTA TARJETAS DE NAVIDAD
MATERIALES:
- Un jarrón el cual no te importa pintar
- Pintura de manualidades blanca (a base de agua)
- Polvo de hornear
- Brocha de tamaño mediano
- Ramas de árbol seco naturales
- Pintura en aerosol blanca
- Pincitas de ropa chiquitas o ganchos para guindar adornitos
- Hilo de pescar o cordón blanco fino
- Un pedacito de tela blanca, fieltro o bolsa de plástico
- Piedras de tamaño mediano para hacer peso
- Piedras blancas chiqutas
- Cordón de lucesitas tipo LED (aproximadamente 30 pies)
INSTRUCCIONES:
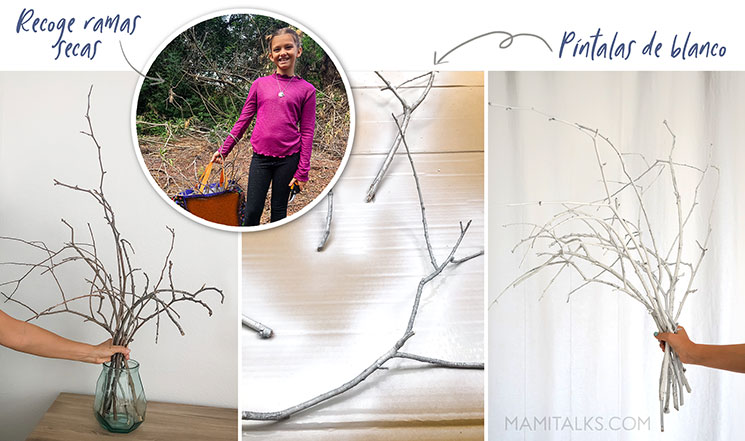
1. Elije ramas de árbol secas naturales (¡a los niños les encantará ayudar con esto!) Y píntalas con aerosol blanco.
2. Mezcla aproximadamente una taza de pintura con 1 cucharadita de polvo de hornear, esto hará que la pintura se vuelva espumosa, agregua más polvo de hornear poco a poco si deseas más textura.
3. Carga la brocha con bastante pintura y cubre el jarrón con una capa gruesa, déjalo secar y aplica una segunda capa si es necesario. Asegúrate de pintar también el interior.

4. Coloca las ramas en el jarrón como crees que quieres que se vean y amárralas con un hilo de pescar.
5. Agrega algunas piedras en el fondo, coloca el grupo de ramas en el medio dentro de las piedras.
6. Agrega más piedras a los lados para que las ramas se queden en el medio de tu jarrón. NOTA: ¡No te olvides de dejar espacio para la pilas de la luz!
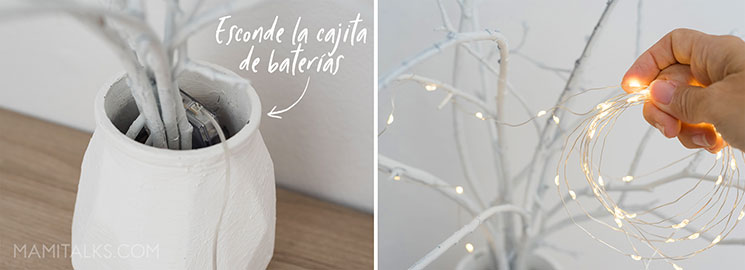
7. Esconde la cajita de pilas de las luces dentro del jarrón y envuelve las luces alrededor de las ramas.
8. Corta trozos de fieltro (o trozos de tela blanca o incluso plástico blanco) y cubre las piedras y la batería.
9. Cubre con piedras decorativas o perlas mini, adornos, ¡lo que prefieras!
10. El porta tarjetas está listo para que pueda colgar sus tarjetas. ¡Usa las pinzas de ropa o cualquier ganchito lindo para colgarlas!
Empieza a hacer este porta tarjetas ahora para que esté listo cuando lleguen las tarjetas de tus seres queridos y no olvides pedir la tuya para que ellos también estén un poquito más cerca de tí y tu familia estas navidades!
CONSEJOS E IDEAS EXTRA
- Me encanta la simplicidad del blanco y el dorado, de esa forma destacan mucho las tarjetas, pero puedes elegir el color que quieras, ¡solo asegúrate de incluir las lucecitas!
- Agrega bolitas de navidad que combinen, tal vez a los niños les encantará colgarlas.
- También puedes usar la cuerda de luces para colgar las tarjetas (a veces la rama puede ser demasiado gruesa).
- A veces puedes encontrar ramas artificiales en las tiendas de manualidades que ya se ven chévere tipo invierno con nieve y todo.
- Cuando busques jarrones, intenta elegir el más pesado con la boca angosta, te facilitará este proyecto.
- Si no encuentras pinzas para la ropa doradas, simplemente píntalas con aerosol dorado.
- Coloca una bandejita con las pinzas junto al porta tarjetas para que cuando llegue una tarjeta nueva sea fácil de colgar.
- Ten en cuenta que las tarjetas con fotos siempre se imprimen con un poco más de contraste que la imagen original.

No Comments